How to Contribute to Open Source Projects on GitHub
a beginner's guide

I'm a creative frontend developer who creates very beautiful and functional websites. I also love to teach people about what I know in the simplest way possible, and learn a little something along the way too.
pov: you're a developer, designer or writer planning to enter the open source world maybe by joining hacktoberfest 2022 or Outreachy but you don't know jack about Git or GitHub. Well this has to be the best guide you'll find. I've tried to reduce use of technical words to make it as beginner and non-coder friendly as possible. Shall we?
Step 1: Your GitHub account
That has to be the most important thing you'll need to start. So go ahead and create an account on GitHub (it's very easy I promise :))and then return for step 2, I'll wait. If you already have an account, let's move to step 2.
Step 2: Pick a project
You just need to get a link to that project on GitHub, it should look like 'https://www.github.com/username/repository'. A repository is basically a home to all the files used on that project. To know a project that is open for contributions, you might see some open issues on the issues tab of the repo (that's what we'll be calling repository now)... which brings us to step 3...
Step 3: Pick an issue
Some issues have tags attached to them to help you identify which issue you can solve. Examples are ui, docs, fix, frontend, and good-first-issue.
This is a practical example of what issues look like.
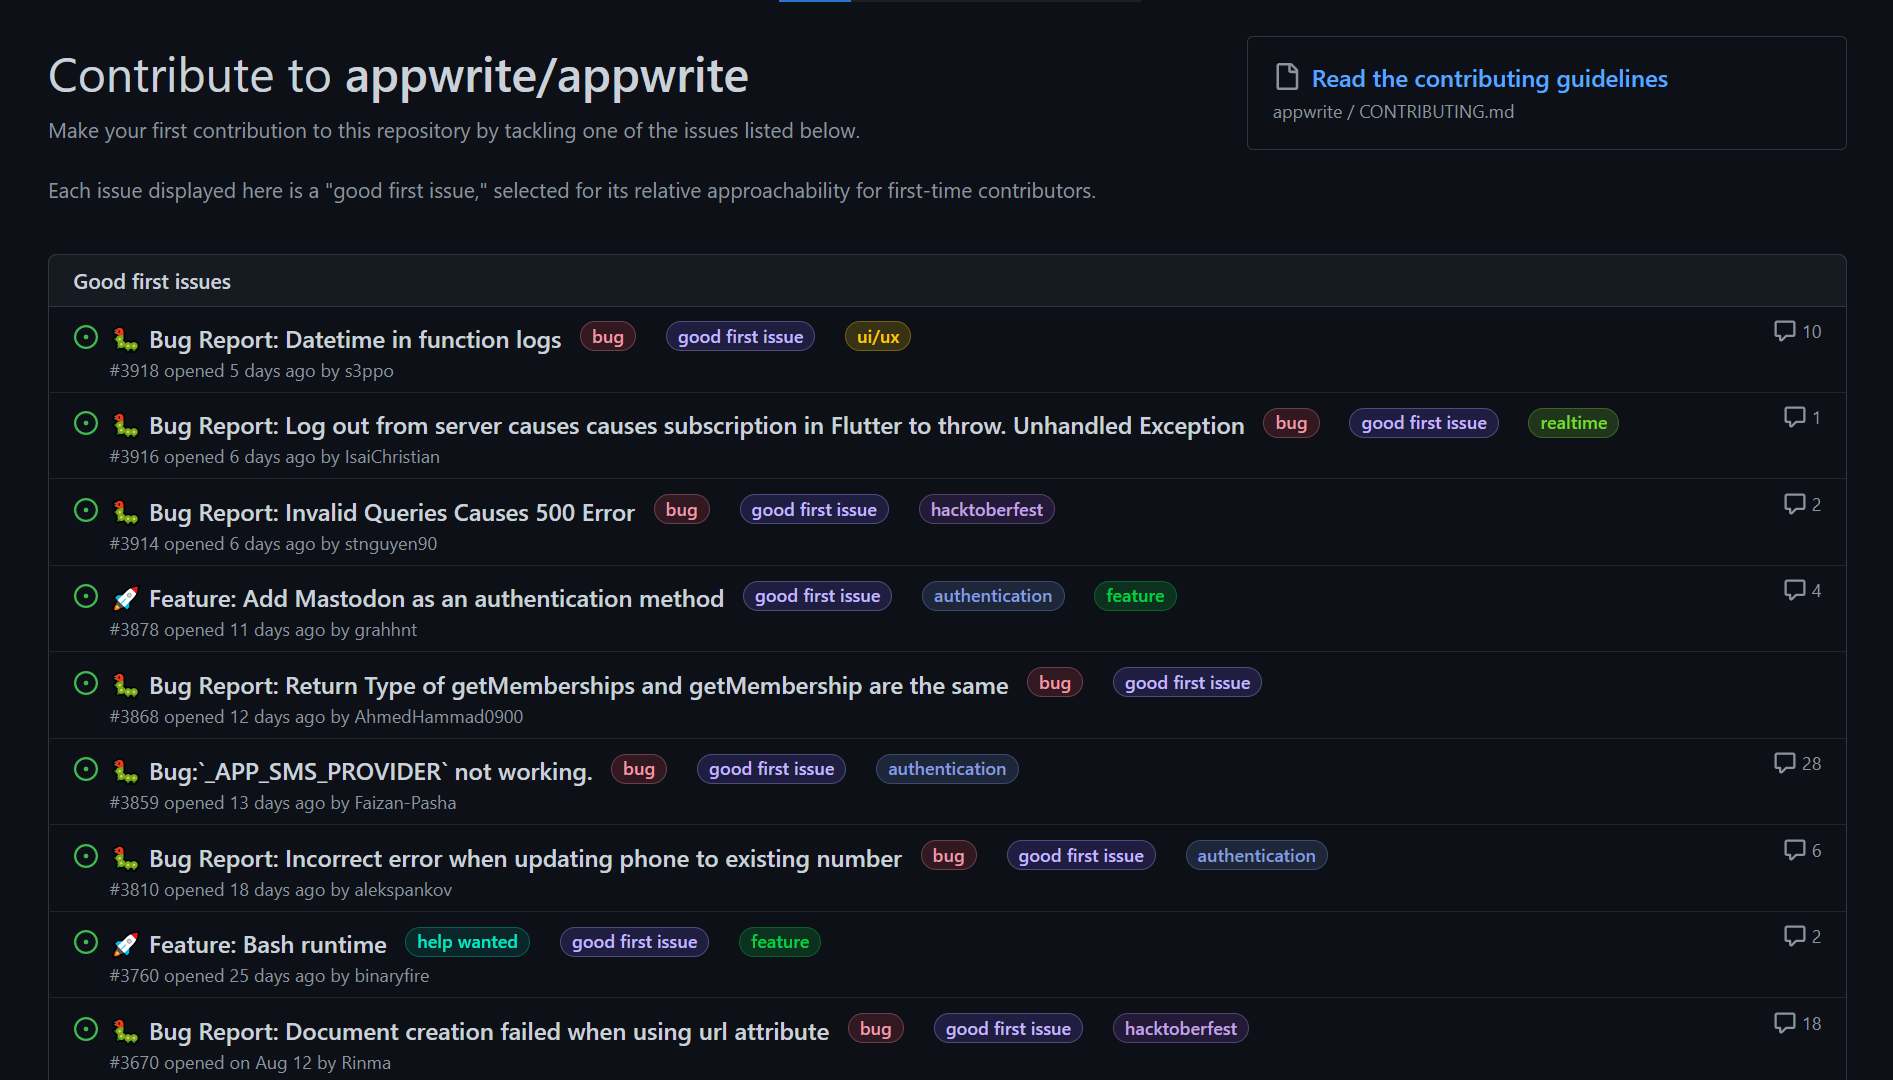
image/repo credits appwrite
Now that you've picked an issue, now to start working. Next up...Step 4: Get a copy of the code
You'll need to do two major things here: fork and clone. Those words probably sound odd/weird, but we'll break it down together.
fork
Forking a repo means you're creating a copy of that repo on from the original to your profile. See it making an online duplicate, or a photocopy of the original.
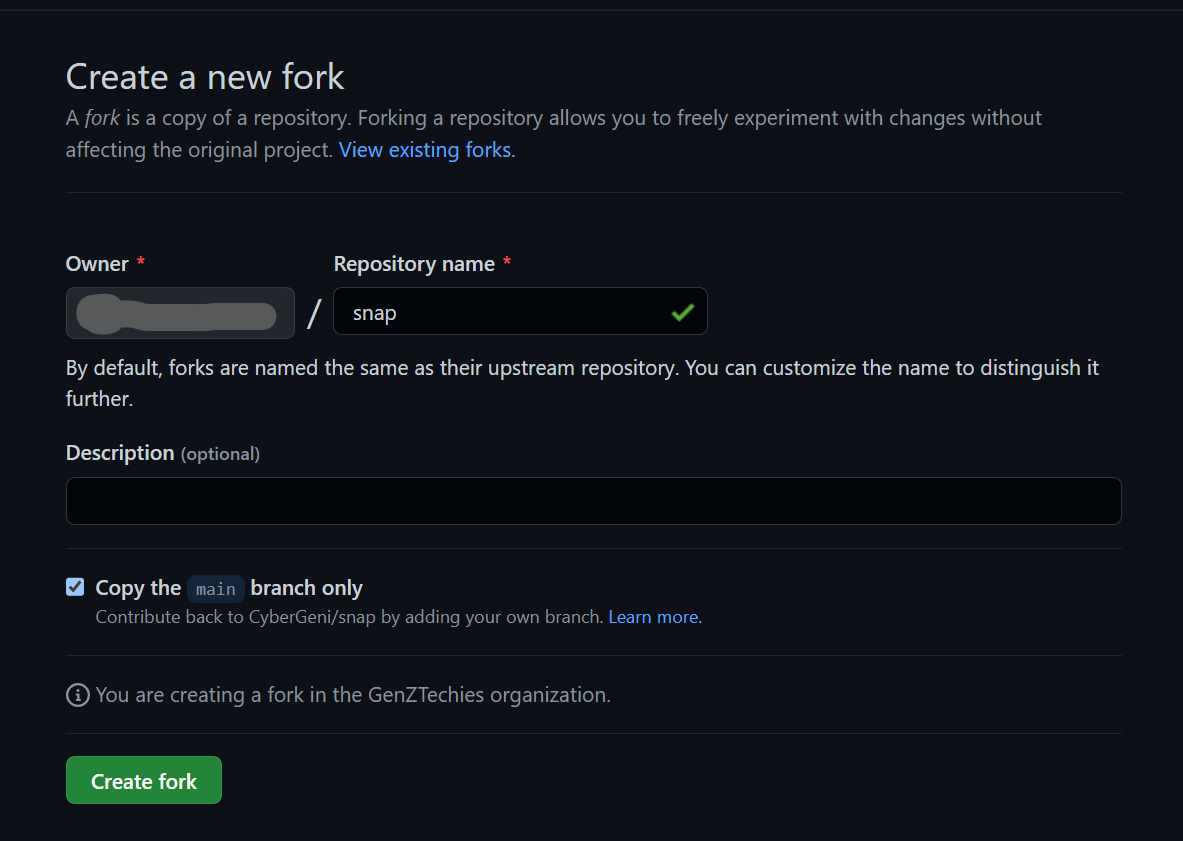
On the repository homepage by the right, there are 3 buttons: watch, fork and star. we need the fork button in the middle. Tap it, add it should bring up a prompt for you to customise. You can change the name and some other stuffs, or you can just skip the stress and complete the fork. Here's where you can find the button below button below:
how the fork button looks:

how the customisation prompt looks like:
clone
Cloning a repo is basically downloading all the content of that repo to your local device.
After forking the repository, you'll see a page with content like this:
 click on the green 'code' button, and tap 'download ZIP'. This will download the entire content of the repository to your local device. There are other ways to clone a repository, but I'll cover that in another article because I promised this will be as beginner friendly as possible.
By now, you should have a copy of the the repository on your device successfully. You can now unzip/extract the folder (on Windows you can just right-click and find an 'extract' button, that should do the trick).
Step 5: Adding your contribution
for coders: Open this folder in your code editor of choice and solve the issue assigned to you. Basically what that means is: add your contribution.
for none coders: Next step depends on your type of contribution. Most times, the steps to contribute will be in the readme.MD file of the repository. The readme file is usually found on the homepage of the repo, what you see immediately you visit the repo. This is where you will find a guide explaining what the project is about and how you can contribute. Just follow that guide, and you'll be fine.
Step 6: Pushing your contribution to GitHub
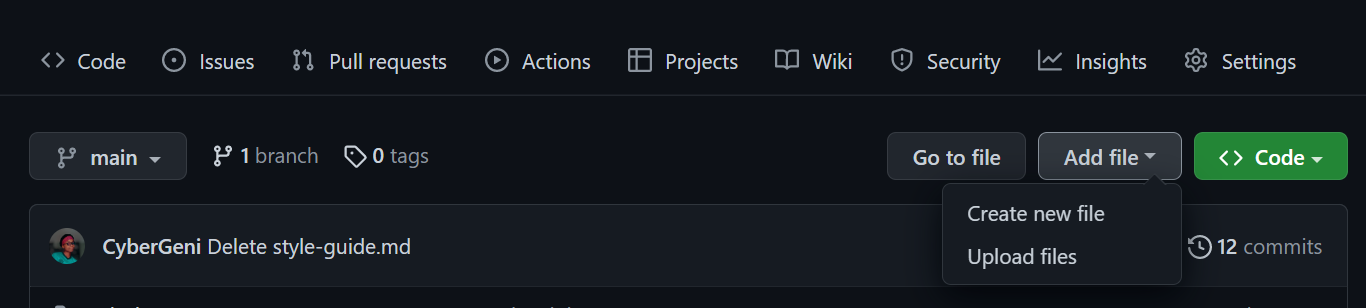
There are 2 ways to do this. Either manual drag and drop, or using Git. I'll consider using Git too technical for this article, so we'll stick to 'drag and drop'. You'll need to go to your cloned repository and upload the file you made changes to directly on GitHub. Look for an Add file dropdown button and tap upload files. It look like below:
You'll see an upload files prompt asking you to choose the files you want to upload. You can now drag the file(s) you made changes to into this box, or tap the choose your files button and locate the files wherever you saved them.
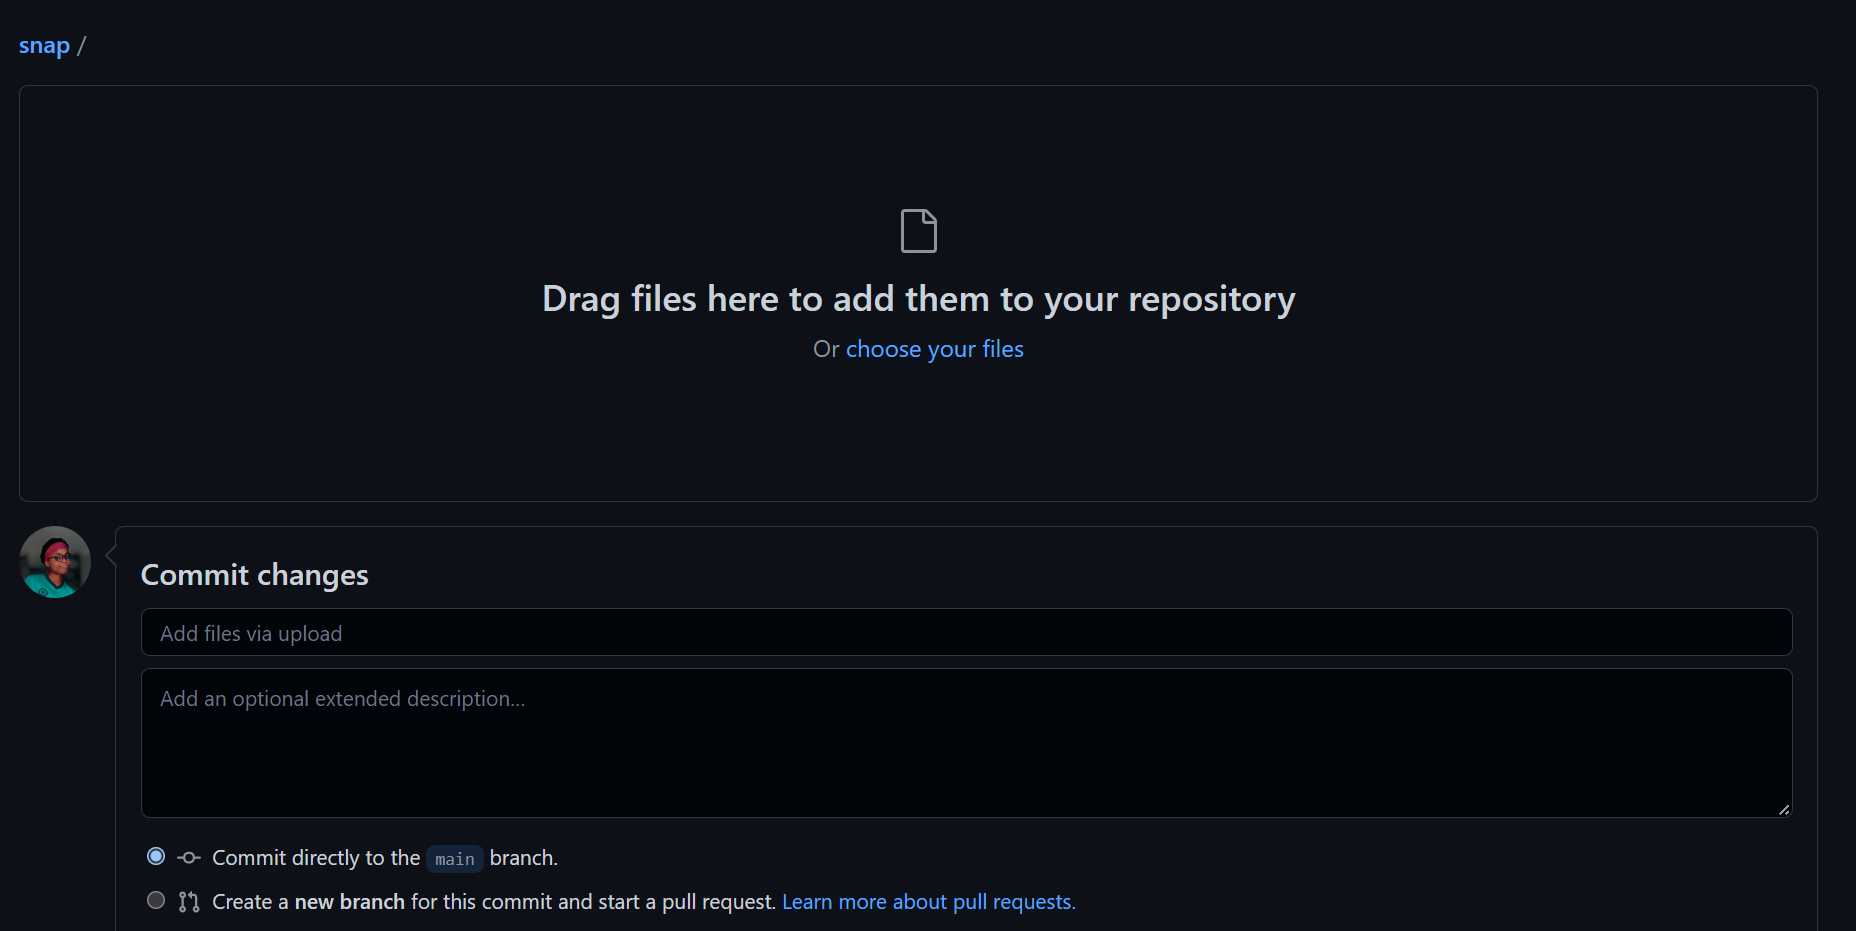
After the files have successfully uploaded, commit the changes by tapping a green button that says 'commit' at the bottom of the page.
Hold on, we're not done. How to you propose the changes you've made to the owner of the project?
Step 7: Opening a pull request
Opening a pull request just means that you're asking the owner/maintainer of the project to take a look at your changes and see if they're fit to be added to the main repository. If they like your changes, they'll merge them.
On your forked repo, you'll see something like the image below:
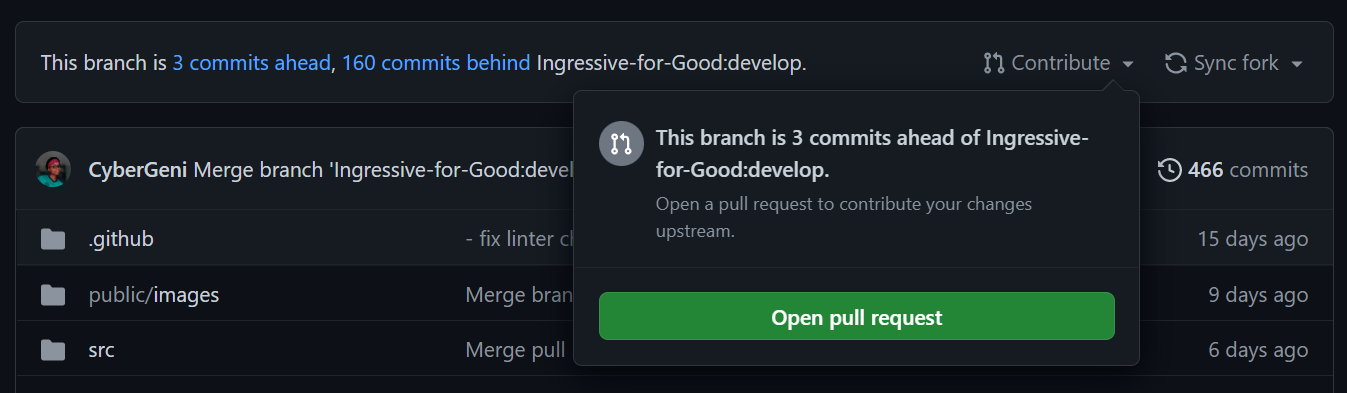
If you see that it says you have some commits behind, you need to pull the changes made by others. That's easy, tap the sync fork button, and then tap update branch.
Note: In situations where there are other people working on this project, you'll need to constantly pull, sometimes even before you make your pull request. This is because since other contributions are being made, you'll need to continuously update the version of code you have, so that there won't be future conflicts.
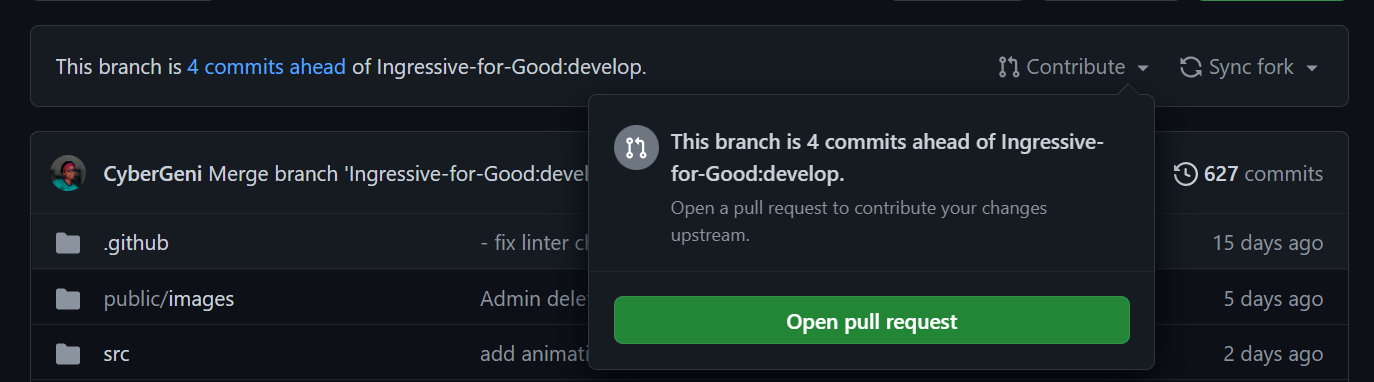
Okay so now that's solved, let's create a pull request. Tap the open pull request button, as seen in the image below.
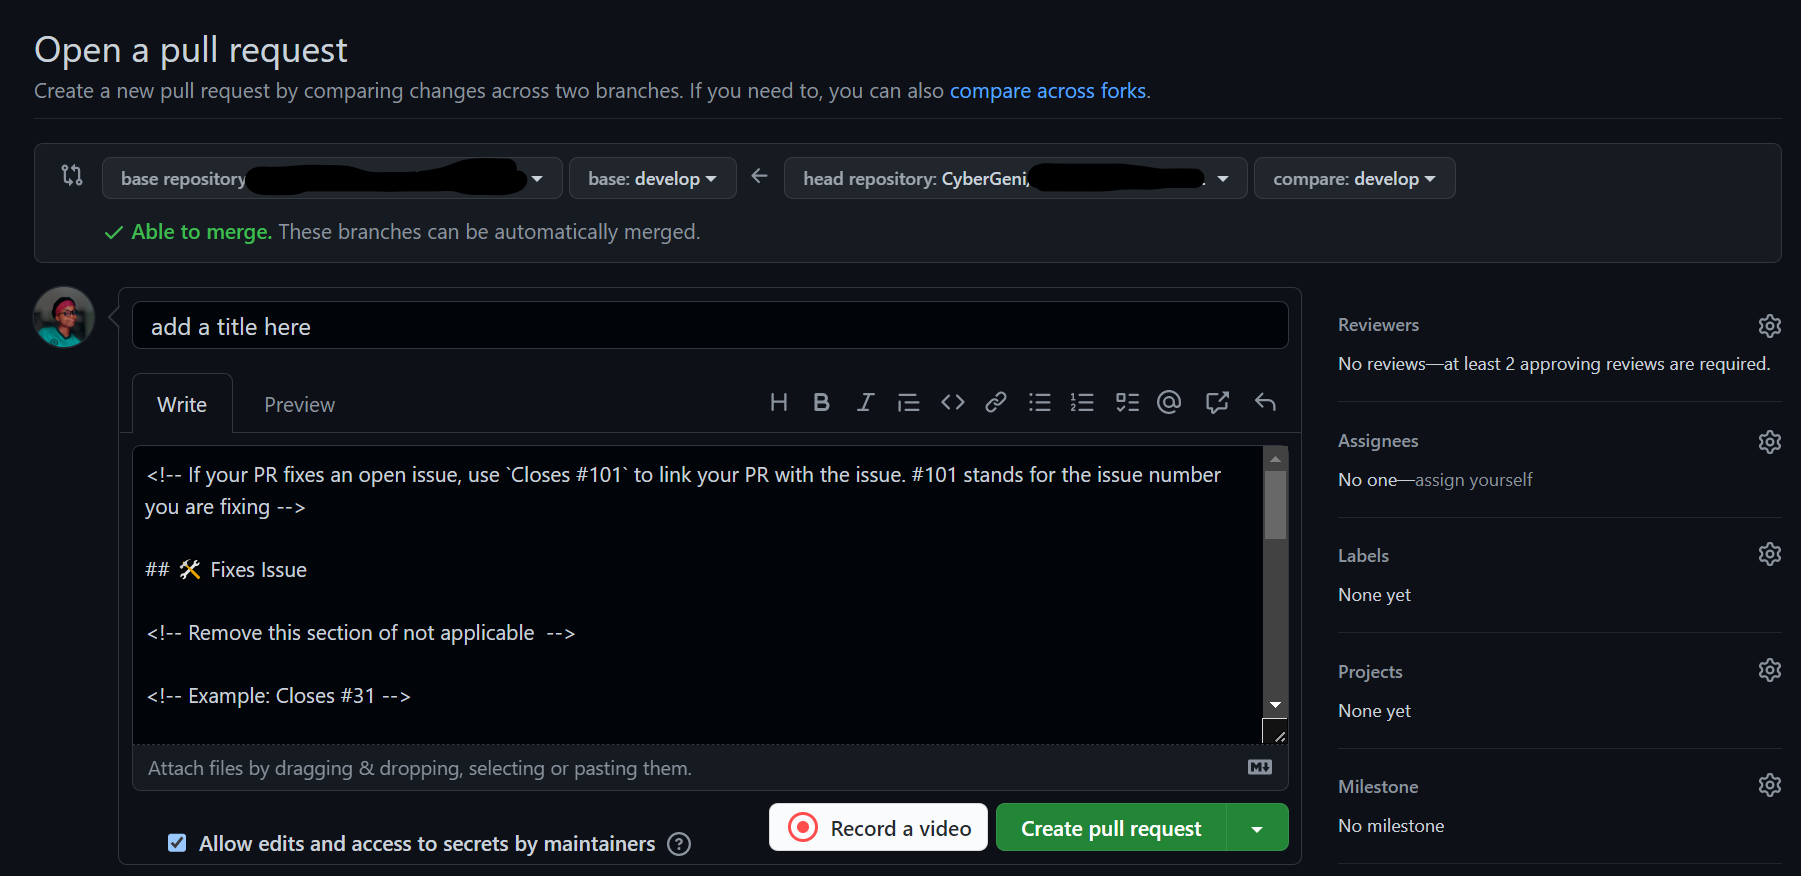
You'll be redirected to this page, where you have to add a title, and some descriptions. It's usually good practice to describe the changes you made here, like bug fixes, features or improvements. Add screenshots, if applicable. Then there's a green button at the button, create pull request. You should tap that.
C'est fini. Really. That's all. What's left now is to wait for someone to review your pull request, and if accepted and merged, you've successfully made an open source contribution. Wasn't so hard ei?
Now go make those contributions, I'm rooting for you! 🚀🚀🚀


